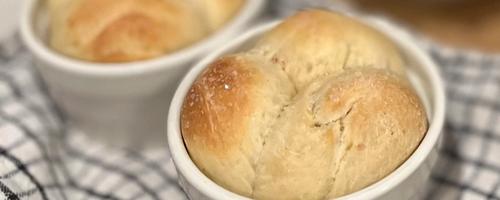
Welcome to my adventures in learning how to make all my own homemade breads. My BIGGEST pet peeve about recipe blogs is all the useless rambling before the recipe... I came here for the recipe, not your life story. So I'll write a dedicated post for my bread making endeavors at some point, and when I do I'll link it here. In the meantime, here's the recipe!! Enjoy.
Clover Rolls
Total Time: 3hr 45min | Hands-on Time: ~20min | Baking Time: 15min
Makes 4 Ramekin Loaves (or 12 muffin tin mini loaves)
Ingredients:
- 2 1/4 tsp active dry yeast (1 pouch)
- 2 tbs sugar
- 1/2 cup milk - warmed to ~105 degrees
- 6 tbs butter
- 255g (2 cups) - flour
- 1 tsp salt
- 1 large egg
Step 1: Make the dough (~30min)
- Combine yeast and 1 teaspoon of the sugar with the warmed milk. Let stand for 5-10 minutes until the mixture gets foamy.
- While you wait, combine dry ingredients in a stand mixer: flour, salt and remaining sugar.
- Once the yeast is nice and bubbly, add the yeast mixture and egg to the dry ingredients and mix on low with the hook attachment for 5-10 minutes, until the dough is smooth.
- Melt 4 tablespoons of the butter and carefully add it to the mixing bowl. Mix on low until the butter stops sloshing, then turn it up to medium. Knead for 5-10 minutes until the dough is shiny and elastic.
NOTE: This is the most challenging step for me because it feels like the butter is NEVER going to incorporate... but I promise, eventually it does. Sometime I turn off the mixer and knead it a bit by hand to get it started. I was curious why we wouldn't just add the butter at the start to avoid the drama, so I googled it: according to MasterClass article written about bread-making "fat bonds to gluten proteins, preventing them from bonding to each other, so adding it later gives the gluten network a chance to develop, ensuring the structure of the final product".
Step 2: First Rise (1-2hr)
- Remove the bowl from the mixer, gather the dough in a ball at the bottom of the bowl, cover and let rise for 1 - 2 hours until doubled in size.
Step 3: Shaping the Dough (~5min)
- Remove the dough from the mixing bowl and divide into 4 even pieces
(To make mini-rolls, you can split the dough into 12 even pieces and use muffin tins instead of ramekins.) - Divide each piece into 3 smaller pieces, roll into little balls and arrange in a greased ramekin (or muffin tin).
- Repeat with remaining dough.
Step 4: Final Rise (45min - 1hr)
- Cover and let rise for another 45min - 1hr until they get puffy.
- Pre-heat the oven to 375 degress.
Step 5: Bake (15min)
- Melt and brush the dough with about half the remaining 2tbs of butter.
- Bake for 13-15mins until golden and fluffy! (10-12 minutes if you went with the mini muffin tin loaves)
- Brush with the rest of the butter, sprinkle with some salt and enjoy!
I made these again and made a double batch so I could freeze the extra for later! I just baked 2 ramekins worth and froze the rest of the dough after shaping. Then when I was ready for more, I pulled what I needed out of the freezer, popped them in the ramekins and baked them as directed after they had time to defrost and rise.